Table of Contents >> Show >> Hide
- What Is Garden Lime, Really?
- How Soil pH Affects Your Plants
- When Your Yard Actually Needs Garden Lime
- Choosing the Right Lime for Your Landscape
- How Much Garden Lime Should You Use?
- The Best Time to Apply Garden Lime
- Step-by-Step: How to Apply Garden Lime
- Safety, Kids, Pets, and the Environment
- Common Mistakes to Avoid with Garden Lime
- Real-World Experiences: Getting Lime Right in Home Landscapes
- Conclusion: Lime as Your Soil’s Secret Reset Button
If your yard feels like it’s doing everything “right” watering, mulching, fertilizing and your plants still sulk, the problem might not be what you’re adding, but what’s already in the soil. That’s where garden lime quietly steps in as the unsung hero of lawn care and home landscaping.
Garden lime doesn’t feed plants the way fertilizer does. Instead, it changes the soil pH, unlocking nutrients that are already there but trapped by acidity. Used correctly, lime can turn a tired lawn into a lush carpet and help vegetables and ornamentals thrive. Used incorrectly, it can leave you with yellowing leaves, stunted plants, and a strong desire to blame the neighbor.
Inspired by the practical, down-to-earth style of Bob Vila–type advice, this guide breaks down what garden lime is, when you actually need it, how to apply it safely, and the biggest mistakes to avoid. We’ll also walk through real-world experiences so you can learn from what’s worked (and what hasn’t) in other home landscapes.
What Is Garden Lime, Really?
Garden lime, often called agricultural lime or “ag lime,” is usually finely ground limestone made mostly of calcium carbonate. Its job is simple but powerful: it raises soil pH, making acidic soil more neutral so plants can access nutrients more easily.
Calcitic vs. Dolomitic Lime
Most bags of lime at the garden center fall into two categories:
- Calcitic lime: Primarily calcium carbonate. Great when your soil is acidic but already has enough magnesium.
- Dolomitic lime: Contains both calcium carbonate and magnesium carbonate. Ideal if your soil test shows low magnesium as well as low pH.
Both types will raise soil pH. The choice usually comes down to what your soil test says about magnesium levels and which product is easier and more economical to get locally.
Pelletized vs. Pulverized Lime
Garden lime is sold in different physical forms:
- Pelletized lime: Tiny pellets of compressed lime powder. Easy to spread evenly with a broadcast or drop spreader, especially on lawns. It breaks down more slowly but is very user-friendly.
- Pulverized (powdered) lime: Very fine particles that work quickly but can be dusty and harder to spread evenly. Better suited to garden beds where you can mix it into the soil.
For most home landscapes, pelletized lime is the less messy, more forgiving option, particularly for large lawns.
How Soil pH Affects Your Plants
Soil pH is a measure of how acidic or alkaline your soil is, on a scale from 0 to 14. A pH of 7 is neutral. Below 7 is acidic; above 7 is alkaline.
Why does this matter? Because soil pH controls how available key nutrients are to your plants. In very acidic soil (say, pH 5.0–5.5), nutrients like nitrogen, phosphorus, and potassium may be present but “locked up,” so roots can’t absorb them efficiently. You can keep dumping fertilizer on, but your plants will still act hungry.
Most common lawn grasses, vegetables, and many ornamentals are happiest in a slightly acidic to neutral range, generally around pH 6.0–7.0. In that “sweet spot,” nutrients are available, beneficial soil microbes are active, and roots can grow easily.
Plants That Don’t Want Lime
Some plants actually prefer more acidic soil and can be harmed by liming:
- Blueberries
- Azaleas and rhododendrons
- Mountain laurel, camellias, and some conifers
If you’re growing acid-loving plants, you typically do not want to add garden lime in their planting area. In mixed landscapes, it’s common to lime the lawn and most beds but keep a separate acidic corner for these specialty plants.
When Your Yard Actually Needs Garden Lime
Here’s the golden rule: never apply garden lime without a soil test. Guessing based on how your yard “looks” is a great way to overcorrect and end up with alkaline soil, which causes its own set of problems.
Start with a Soil Test
You have two options:
- Cooperative extension soil test: Many state universities offer affordable soil testing. You mail in a sample and get a detailed report with your soil pH, nutrient levels, and specific lime recommendations for lawns, vegetables, or ornamental beds.
- At-home test kits or meters: These can give a rough idea of soil pH. They’re useful as a quick check but may not be as precise or detailed as a lab report.
In general, lime is recommended when lawns or garden beds test below about pH 6.0 and you’re growing plants that prefer near-neutral soil. Vegetable gardens often do well in the 6.2–6.8 range, and many turf grasses perform best around 6.0–7.0.
Soil Type Matters
The amount of lime your yard needs isn’t one-size-fits-all. Clay and organic-rich soils can hold more acidity and usually require more lime to shift the pH than sandy soils. Sandy soils, on the other hand, respond to smaller applications more quickly but may drift back toward acidity faster over time.
This is another reason to rely on that lab report: it combines pH, soil texture, and other properties to recommend a realistic lime rate per 1,000 square feet.
Choosing the Right Lime for Your Landscape
Calcitic vs. Dolomitic in Practice
If your soil test shows low pH and normal magnesium levels, calcitic lime is usually fine. If it shows low pH and low magnesium, dolomitic lime can both raise pH and correct the magnesium deficiency.
Don’t stress too much about microscopic calcium-to-magnesium ratios unless your soil test specifically flags it. In most home landscapes, the “best” lime is the one that matches your soil’s nutrient profile and is readily available at a reasonable price.
Avoid Hydrated Lime in the Home Garden
One product you’ll sometimes see is hydrated lime (also called slaked lime). It reacts very quickly and is used in some construction and industrial settings. For home gardeners, it’s usually not recommended because:
- It can cause chemical burns to skin and eyes.
- Its dust can irritate or damage lungs.
- It can overshoot soil pH very easily.
Stick with agricultural or garden lime meant for lawns and garden beds, and you’ll have a much safer, more manageable product.
How Much Garden Lime Should You Use?
This is where those nice generic “use 40 pounds per 1,000 square feet” guidelines can get people into trouble. The proper amount depends on:
- Your current soil pH
- Your target pH (based on what you’re growing)
- Soil texture (sand, loam, clay)
- The fineness and type of lime product
A lab soil test report usually includes a recommended rate like “Apply X pounds of finely ground limestone per 1,000 square feet” for your specific situation. Follow that first. If you’re only working with a DIY pH reading and no lab report, it’s safer to apply a moderate rate and retest in a few months than to dump a heavy dose all at once.
Over-liming can push soil pH too high, causing nutrient deficiencies (especially iron and manganese) and interfering with magnesium uptake. Once you’ve overshot, bringing pH down is much harder than nudging it up.
The Best Time to Apply Garden Lime
Fall is often considered the ideal time to apply garden lime to lawns and planting beds. Cooler temperatures and winter moisture help the lime slowly react with the soil so pH is better adjusted by spring.
You can also apply lime in early spring, especially before preparing new beds. Just remember that lime isn’t instant; it can take a couple of months or more for pH to shift meaningfully.
Regardless of the season, avoid spreading lime on dry, dusty soil on a windy day (unless you enjoy snorting chalk) or on frozen, waterlogged ground where it can’t be incorporated properly.
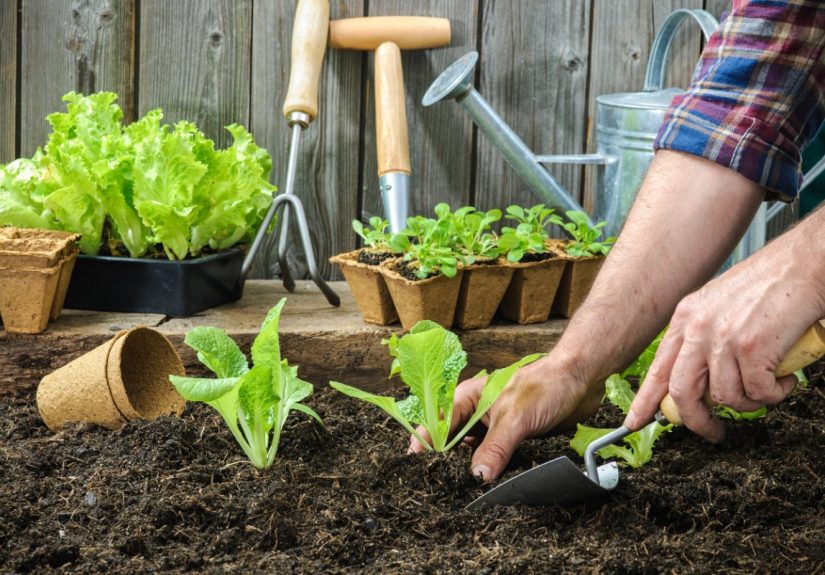
Step-by-Step: How to Apply Garden Lime
For Lawns
- Test the soil. Get a current soil pH and lime recommendation.
- Mow and clean up. Mow the grass and remove heavy thatch or debris so the lime can reach the soil surface.
- Aerate if needed. Core aeration helps lime move deeper into compacted soil, especially in older lawns.
- Set your spreader. Use the setting recommended on the lime bag or from your soil test report. Start with pelletized lime if you’re new to this.
- Apply in two directions. Spread half the lime walking north–south, then the other half east–west for even coverage.
- Water it in. Lightly water the lawn after application to wash lime off grass blades and begin moving it into the soil.
For Garden Beds and Planting Areas
- Prepare the bed. Remove old plant debris and loosen the top few inches of soil.
- Measure your area. Know the approximate square footage so you can apply the correct amount per 100 or 1,000 square feet.
- Spread the lime. Sprinkle the recommended amount evenly over the bed surface. You can use a small hand spreader or simply broadcast by hand with gloves.
- Mix it in. Use a hoe, rake, or tiller to incorporate lime into the top 3–6 inches of soil. This helps it react more quickly and uniformly.
- Water well. Give the bed a thorough watering to settle the soil and start the chemical reaction.
For existing perennials, be gentler. Lightly top-dress around plants and let rainfall gradually move lime into the root zone rather than aggressively tilling and disturbing established roots.
Safety, Kids, Pets, and the Environment
Garden lime is generally considered safe when used as directed, but a few precautions are smart:
- Wear gloves and avoid breathing dust, especially with powdered products.
- Keep children and pets off freshly limed areas until you’ve watered it in and the surface has dried.
- Store bags of lime in a dry, secure place where kids and animals can’t get into them.
Environmentally, lime can reduce the need for excessive fertilizer by improving nutrient availability, which may help lower nutrient runoff over time. The key is to apply simply what your soil test recommends no more, no less.
Common Mistakes to Avoid with Garden Lime
- Skipping the soil test. This is the number-one mistake. Without it, you’re guessing in the dark.
- Assuming all brown grass needs lime. Brown patches could be drought, disease, insects, compaction, or dog spots, not necessarily low pH.
- Over-liming “just to be safe.” More is not better. Over-liming can cause nutrient lock-up and stress plants.
- Using lime around acid-loving plants. Blueberries and azaleas will file a formal complaint (in the form of chlorotic leaves).
- Expecting instant results. Lime is a slow, steady soil amendment, not a quick green-up product like some fertilizers.
Real-World Experiences: Getting Lime Right in Home Landscapes
Books and data are great, but gardeners are storytellers. Here are some typical scenarios that show how garden lime plays out in real home landscapes and how you can learn from them.
1. The Patchy Front Lawn That Wasn’t “Just Old”
Imagine a 20-year-old front lawn in a humid region: patchy grass, moss in the shady areas, plenty of fertilizer used over the years, and yet the yard still looks tired. The homeowners assumed the lawn was just “worn out” from age and foot traffic.
A soil test finally revealed the truth: a pH around 5.3, which is more acidic than most turf grasses prefer. Nutrients from fertilizer were there, but the grass plants couldn’t take them up efficiently. The recommendation: several applications of pelletized calcitic lime over a couple of years, with aeration before the first application.
They limed in the fall, aerated, and kept mowing and watering as usual. The following spring, the lawn wasn’t magically transformed overnight, but by late spring and early summer, the grass was noticeably thicker and greener with less fertilizer. Moss receded in some areas as grass became more competitive. Lime didn’t fix everything, but it removed a major hidden obstacle.
2. The Vegetable Garden That Wouldn’t Produce
Another common story: a raised vegetable bed that looks gorgeous in early spring, then slowly turns into a land of yellowing tomatoes and sad peppers. The gardener adds more compost, more organic fertilizer, maybe even Epsom salt, but nothing really clicks.
When they finally send a soil sample to a local extension lab, the results show a pH around 5.5 and low magnesium. In that range, certain nutrients especially phosphorus are less available. The recommendation: a moderate application of dolomitic lime to raise pH and supply magnesium, followed by a retest in six months.
The following year, after liming in fall and replanting in spring, plant growth improves. Tomatoes have stronger stems and fewer blossom-end issues, peppers set more fruit, and leafy greens look richer. The gardener still needs to fertilize and water properly, but lime quietly fixed the underlying chemistry that had been sabotaging their efforts.
3. The “More Lime, More Green” Myth
On the flip side, some homeowners hear that lime is “good for lawns” and start applying it every year without testing. At first, this might not cause problems, especially in naturally acidic regions. But after several years, the soil pH can creep up too high say, into the 7.5–8.0 range particularly on lighter soils.
Suddenly, iron becomes less available, and the lawn develops a yellow cast despite adequate nitrogen. The owner responds with more fertilizer…and sometimes even more lime, thinking the lawn must still be “acidic.” In reality, it’s now too alkaline. Correcting the situation may require sulfur or acidifying fertilizers, plus time and careful monitoring.
The lesson: lime is a tool, not a routine. It’s something you apply because your soil test says you need it, not because it’s spring and you’re feeling optimistic in the garden center.
4. Balancing Mixed Landscapes
Plenty of home landscapes combine lawns, perennial borders, and corners with acid-loving shrubs or blueberries. In these yards, successful gardeners often treat lime like a “zoned” product:
- Lime is regularly considered for the lawn and general beds, based on periodic soil tests.
- The area with blueberries, azaleas, or other acid-lovers is intentionally excluded from liming and may even receive soil acidifiers instead.
This “zoning” approach lets you tailor pH to what each plant group prefers, rather than trying to force your entire yard into one pH range.
5. Patience Pays Off
One consistent theme in gardener experiences with lime: you have to play the long game. Lime works over months, not days. Most people see the best results:
- After liming in fall and reassessing plant growth the following spring and summer.
- By combining liming with other good practices like core aeration, proper fertilizing, and not mowing the lawn too short.
- Through periodic soil tests every few years to confirm that pH is staying in the target range.
When used strategically, garden lime becomes less of a “mystery powder” and more of a quiet partner in building healthier, more resilient soil. It doesn’t replace good watering, mulching, or plant selection but it makes all those efforts more effective by giving roots a better chemical environment to work in.
Conclusion: Lime as Your Soil’s Secret Reset Button
You don’t need to be a chemist to use garden lime effectively, but you do need to understand the basics: what it is, what it does, when it helps, and when it doesn’t. Start with a soil test, choose the right type of lime for your yard, apply it at the recommended rate, and give it time to work.
Used thoughtfully in true Bob Vila fashion garden lime can quietly reset your soil chemistry, freeing up nutrients, supporting healthier lawns and landscapes, and saving you money and frustration in the long run. It’s not flashy, but your plants will absolutely notice the difference.


