Table of Contents >> Show >> Hide
- Before You Repair Anything: Find the Leak and Stay Safe
- Way #1: Stop the Leak Fast With a Tarp (Emergency Fix)
- Way #2: Replace Missing or Damaged Shingles (The Classic Fix)
- Way #3: Repair or Replace Flashing Around Chimneys and Roof Penetrations
- Way #4: Patch Small Holes, Nail Pops, and “Mystery Pinholes”
- Way #5: Fix the “Water Highway” Problems (Valleys, Gutters, and Drainage)
- When DIY Stops Making Sense (And That’s Okay)
- Quick Prevention Tips (So You Don’t Do This Again Next Weekend)
- of Experience: What Roof Leaks Teach You (Whether You Asked or Not)
- Wrap-Up
A roof leak has one special talent: it can make a tiny problem feel like a full-blown indoor weather event.
One minute you’re living your life, the next you’re strategically placing mixing bowls like you’re auditioning
for a “Kitchen Percussion” tour.
The good news: many common roof leaks come from a handful of predictable trouble spotsdamaged shingles,
failing flashing, cracked vent boots, clogged valleys, or tiny holes from nails or fasteners. The better news:
you can often stop the water quickly, then decide whether a DIY repair makes sense or if it’s time to call in
a pro. The key is to act fast (water doesn’t wait politely) and work safely (gravity is undefeated).
Before You Repair Anything: Find the Leak and Stay Safe
Step 1: Confirm it’s a roof leak (and not a “roof-ish” leak)
Water stains on a ceiling don’t always sit directly under the leak. Water can travel along rafters, decking,
insulation, or even a nail line before it finally drips into your living space. That’s why the “drip spot”
is often the last place you should look on the roof.
Step 2: Do a quick interior check first
- Attic inspection: Look for damp insulation, dark stains on wood, or shiny wet spots.
- Follow the trail: Trace moisture uphill toward the roof penetration or seam where water may be entering.
- Mark the area: If you can safely do so, mark the suspected zone so you can match it outside.
Step 3: Safety is not optional
If your roof is steep, high, wet, icy, or you’re not comfortable up therestop. A “simple” roof job isn’t worth
a trip to the ER. Consider hiring a licensed roofer, especially for multi-story homes, complex rooflines, or
storm damage. If you do go up, use stable ladders, proper footwear, and avoid working in rain or high winds.
Way #1: Stop the Leak Fast With a Tarp (Emergency Fix)
If water is actively coming in, your first goal is damage control. A roof tarp is the MVP of “I need this
dry right now.” It won’t replace a real repair, but it can buy you time to prevent soaked drywall, ruined insulation,
and bigger structural problems.
When a tarp makes sense
- Storm damage (missing shingles, punctures, lifted edges)
- A leak you can’t fully fix immediately (materials or weather delay)
- Temporary protection while waiting for a professional repair
How to do it (high-level, safety-first)
- Cover beyond the problem: The tarp should extend several feet past the damaged area.
- Make water shed, not pool: Position it so water runs off the roof normally.
- Secure it well: The goal is tight, smooth coverage that won’t flap or catch wind.
In major disasters, some areas may qualify for reinforced temporary coverings through programs like “blue roof”
initiatives. But for everyday leaks, a properly installed tarp is still one of the quickest ways to reduce interior damage.
Pro tip: Even after tarping, check your attic and ceilings periodically. The tarp may stop new water, but trapped moisture
still needs drying and ventilation.
Way #2: Replace Missing or Damaged Shingles (The Classic Fix)
On asphalt-shingle roofs, a leak often starts when shingles crack, slide out of place, lose their seal, or disappear
entirely (thanks, wind). Replacing a few shingles can be a very effective repair when the rest of the roof is in decent shape.
What to look for
- Shingles that are missing, cracked, torn, or visibly worn
- Shingles that are curled or lifted along edges or corners
- Exposed nails (“nail pops”) or holes where fasteners backed out
What the repair usually involves
The basic idea is: carefully remove the damaged shingle, slide a matching replacement into place, fasten it correctly,
and seal exposed nail heads. For curled shingles that are otherwise intact, roofing cement can sometimes re-secure the edge.
Real-world example: If you notice a leak only during wind-driven rain, the problem may be a lifted shingle edge that
lets water blow uphill. Re-securing that edge (or replacing a cracked shingle) can stop the leak without touching the whole roof.
Watch out: If you find lots of brittle shingles, widespread granule loss, or multiple problem areas, a “few replacements”
may be a short-term patch on an aging roof. That’s when an inspection for broader repairor replacementbecomes smarter.
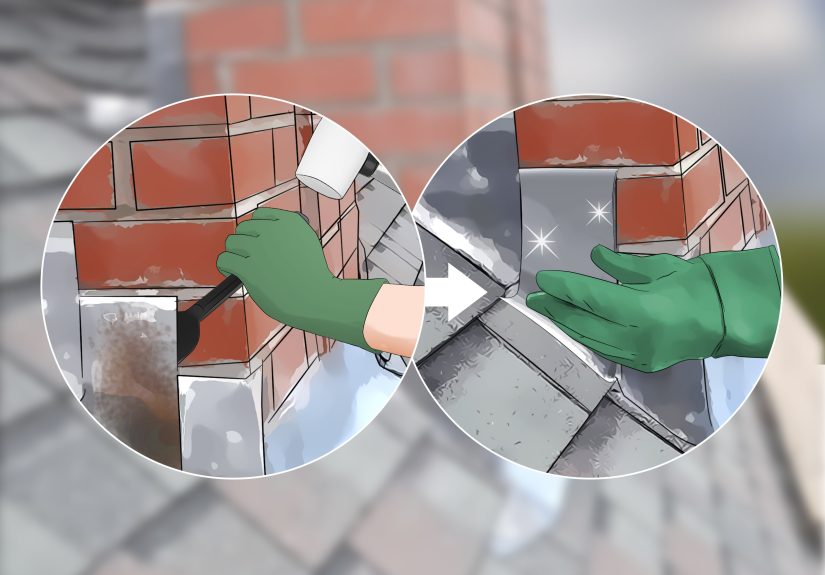
Way #3: Repair or Replace Flashing Around Chimneys and Roof Penetrations
Flashing is the thin metal (and sometimes layered system) that seals transitionswhere the roof meets a wall,
chimney, skylight, or vent pipe. If shingles are the “skin” of the roof, flashing is the “joints.” And joints
are where leaks love to start.
Common flashing leak zones
- Chimneys: Step flashing along the sides, apron flashing at the front, and counterflashing embedded into masonry
- Vent pipes: The rubber or metal “boot” around plumbing vents can crack or pull away over time
- Skylights: Flashing kits or perimeter seals can fail, especially if debris traps water
- Roof-to-wall intersections: Areas where roof planes meet vertical walls (like dormers)
Why “just caulk it” usually isn’t the hero
Sealant can help as part of a repair, but flashing works best as a layered, overlapping system that physically directs water away.
When flashing is corroded, loose, incorrectly lapped, or missing, a bead of caulk often becomes a temporary bandageuntil sun, temperature changes,
and movement crack it again.
Vent boot replacement (a very common fix)
Vent boots can develop cracks or tears, especially around the rubber collar. A typical repair involves lifting nearby shingles carefully,
removing the old boot/flashing assembly, sliding a new unit over the pipe, tucking it under the upper shingle course, fastening it, and sealing exposed fasteners.
Real-world example: A leak that appears after long, steady rainespecially near a bathroom or kitchen vent lineoften points to a failing vent boot.
Fixing that single component can stop the leak completely.
When to call a pro: Chimney flashing repairs can get complicated fast, especially if counterflashing is involved or the masonry is deteriorating.
If you’re seeing leaks around a chimney, it’s worth having a roofer or chimney professional evaluate the full assembly.
Way #4: Patch Small Holes, Nail Pops, and “Mystery Pinholes”
Sometimes a roof leak isn’t dramatic. It’s sneaky. Tiny holes from nails, screws, or fasteners can let water in for a long time before
you see a stain. The repair approach depends on what’s causing the opening and whether surrounding materials are still sound.
Common causes of small leaks
- Nail pops: Nails that have backed out slightly can create a pathway for water
- Old fastener holes: Left behind from removed fixtures or old roofing components
- Minor punctures: Fallen branches or debris impacts that don’t rip a whole shingle
Typical repair method
For small holes under or near shingles, a common approach is to lift the shingles around the area, place a piece of roof flashing beneath the affected spot,
and use roofing cement or appropriate sealant along the edges so water can’t push underneath. Exposed nail heads should be sealed properly.
Real-world example: If you see a single brown ring on the ceiling that grows slowly over months, it may be a tiny fastener hole rather than a major
shingle failure. Those are often very fixableonce you locate the true entry point.
Important: If you discover soft or rotten roof decking around the hole, that’s beyond a quick patch. Rotten wood won’t hold fasteners reliably and
usually indicates longer-term moisture intrusion that needs professional assessment.
Way #5: Fix the “Water Highway” Problems (Valleys, Gutters, and Drainage)
A roof leak isn’t always about a single broken pieceit can be caused by water being forced where it doesn’t belong.
Roof valleys (where two slopes meet) move a lot of water. Gutters and downspouts control where that water goes next.
When those systems clog or fail, water can back up under shingles, overflow near flashing, or seep into vulnerable seams.
Valleys: where water concentrates
Valleys are designed to channel water down and off the roof. Because they handle heavy flow, they’re among the most leak-prone areas if debris builds up,
flashing is damaged, or shingles were installed incorrectly along the valley line.
Gutters and downspouts: where water exits the roof system
- Clear leaves and debris so water doesn’t overflow onto fascia or back up under shingles.
- Make sure downspouts discharge water away from the foundation.
- Look for signs of overflow: staining on fascia boards, water marks under gutter lines, or erosion below discharge points.
What a repair might involve
Minor fixes can include clearing debris, re-establishing proper water flow, and replacing damaged sections of valley flashing or underlayment
(often best handled by a pro because it can require shingle removal and precise layering). The goal is simple: keep water moving off the roof,
not sideways under it.
Real-world example: If your leak shows up during heavy rain but not during light showers, suspect a “volume problem” like a clogged valley or overflow
at a gutter corner. High water volume reveals drainage weaknesses.
When DIY Stops Making Sense (And That’s Okay)
Some leaks are straightforward; others are warning lights for bigger issues. Consider calling a professional if you notice:
- Multiple leak spots inside the home
- Soft, spongy roof decking underfoot (do not keep walkingthis can be dangerous)
- Widespread shingle damage or an aging roof with frequent repairs
- Leaks around chimneys/skylights that persist after basic maintenance
- Steep or complex rooflines that are unsafe for homeowner work
If you’re budgeting, costs vary widely based on roof type, access, and the size of the repair. Even so, early repairs tend to be far cheaper than
waiting until water damage spreads into insulation, drywall, and structural wood.
Quick Prevention Tips (So You Don’t Do This Again Next Weekend)
- Inspect after storms: Look for lifted shingles, missing tabs, and debris impacts.
- Keep valleys and gutters clean: Water should always have a clear path off the roof.
- Check flashing annually: Especially at chimneys and vent pipes.
- Trim overhanging branches: Fewer falling limbs, fewer punctures, fewer leaf piles.
- Watch your attic: Poor ventilation and condensation can mimic a roof leak and damage materials over time.
of Experience: What Roof Leaks Teach You (Whether You Asked or Not)
Roof leaks have a way of arriving with perfect comedic timinglike the moment you finally sit down with a snack, or five minutes before guests show up.
One of the first lessons most homeowners learn is that water is a clever traveler. The drip in your living room might be “sponsored by” a vent boot leak
several feet away, with water quietly riding a rafter like it bought a train ticket. That’s why the attic check matters so much: the stain you see is often
the finale, not the opening scene.
Another common experience: the panic patch. Someone climbs up, smears sealant everywhere, and celebrates too early. It might even workbriefly. But if the real
issue is failing flashing (where overlapping layers should be directing water), sealant alone is like trying to fix a broken umbrella by painting it. The umbrella
still needs ribs and structure. Flashing is the structure.
Then there’s the “it only leaks when it rains hard” mystery. In a lot of homes, that turns out to be a drainage problem: a valley packed with leaves, a gutter
corner that overflows, or a downspout that can’t keep up. Light rain behaves. Heavy rain exposes every weakness and takes the most inconvenient route possible.
Cleaning valleys and gutters isn’t glamorous, but it’s one of the highest-return chores in homeownershiplike flossing, but for your house.
You also learn quickly that tarps are not a permanent lifestyle choice (even if that blue looks surprisingly bold with your shutters). A tarp is an excellent
emergency move, especially when weather won’t cooperate or you need time to get materials. But the goal is always the same: stabilize now, repair properly next.
The best “tarp stories” end with, “It saved my ceiling,” not “It became a long-term roof accessory.”
Finally, roof leaks teach a humbling truth: sometimes calling a pro is the smartest DIY decision. If the roof is steep, high, or showing widespread wear, hiring
an experienced roofer can be cheaper than repeated patchesand much safer than white-knuckling your way across wet shingles. The win isn’t proving you can do it
all yourself. The win is keeping your home dry, safe, and intact… and keeping your kitchen bowls available for their intended purpose: snacks.
Wrap-Up
Repairing a leaking roof usually comes down to five practical moves: stop the water fast (tarp), replace damaged shingles, fix flashing and vent boots,
patch small holes correctly, and restore proper drainage through valleys and gutters. Start with safety and leak detection, choose the right repair for the
likely cause, and don’t hesitate to call a professional when the roof is too steep, the damage is widespread, or the leak keeps coming back.


