Table of Contents >> Show >> Hide
- Before You Start: What Makes Glue Stick Slime Work?
- Basic Supplies for All 3 Glue Stick Slime Recipes
- Way 1: Make Glue Stick Slime With Contact Solution and Baking Soda
- Way 2: Make Glue Stick Slime With All-in-One Slime Activator
- Way 3: Make Glue Stick Slime With Liquid Starch
- Common Glue Stick Slime Problems and Fixes
- Creative Add-Ins for Glue Stick Slime
- How to Store Glue Stick Slime
- Hands-On Experience: What Making Glue Stick Slime Is Really Like
- Conclusion
Glue stick slime sounds like the kind of craft invented by a kid staring into a backpack five minutes before dinner. And honestly? That is part of its charm. You do not always have a bottle of liquid school glue sitting around, but there is often a lonely glue stick rolling in a pencil case, waiting for a second act. With a little warm water, patience, and the right slime activator, that humble stick can become a soft, stretchy, oddly satisfying batch of homemade slime.
This guide explains 3 ways to make glue stick slime: with contact lens solution and baking soda, with all-in-one slime activator, and with liquid starch. Each method starts the same way: you turn solid glue stick into a smooth glue base. After that, the activator does the science-y magic. Think of it as cooking, except the final dish is not edible and should absolutely not be served with crackers.
Safety note: Homemade slime is a craft, not a snack, a face mask, or a pet toy. Adults should supervise children, especially when warm water, microwaving, contact solution, liquid starch, or activators are involved. Wash hands before and after play, avoid eyes and mouths, and throw slime away if it smells strange, dries out, or gets dirty.
Before You Start: What Makes Glue Stick Slime Work?
Most classic slime recipes use liquid school glue because it already spreads easily. Glue sticks are thicker and drier, so they need help. The trick is to chop, mash, or melt the glue stick with a small amount of warm water until it becomes a creamy paste. Once the glue has loosened, you can add an activator.
Slime forms when long glue molecules begin to link together. In simple terms, the glue goes from “runny and sticky” to “stretchy and squishy.” Activators such as contact lens solution, slime activator, and liquid starch often contain borate-related ingredients that help create those links. Add too little and your slime stays sticky. Add too much and your slime turns stiff, rubbery, or tragically similar to a pencil eraser with trust issues.
Basic Supplies for All 3 Glue Stick Slime Recipes
- 2 washable, nontoxic school glue sticks
- 1 to 2 tablespoons warm water
- A microwave-safe bowl or heat-safe cup
- A spoon, craft stick, or silicone spatula
- Food coloring, glitter, or foam beads, optional
- A clean plate, tray, or silicone mat for kneading
- An airtight container or zip-top bag for storage
How to Turn Glue Sticks Into a Slime Base
- Twist up the glue sticks and remove the glue from the tubes.
- Cut or break the glue into small pieces so it softens faster.
- Place the pieces in a bowl with 1 tablespoon of warm water.
- Stir and mash until the glue begins to dissolve.
- If needed, microwave for 8 to 10 seconds at a time, stirring after each burst. Do not overheat.
- Add a few drops of warm water only if the mixture is still chunky.
- Stop when the base looks like thick white glue or smooth pudding.
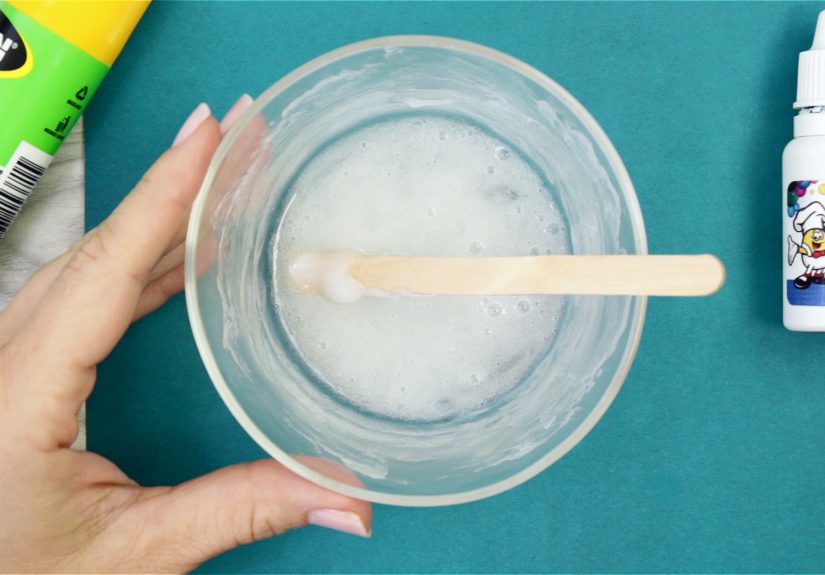
The goal is not soup. A watery glue base makes weak slime. Aim for a thick, glossy paste that slowly slides off the spoon. If it looks like melted marshmallow fluff, you are in the right neighborhood.
Way 1: Make Glue Stick Slime With Contact Solution and Baking Soda
This is one of the most popular ways to make glue-based slime because the ingredients are easy to find in many homes. The baking soda helps firm up the glue mixture, while the contact lens solution acts as the activator. For best results, check the contact solution label. It should contain boric acid, sodium borate, or another borate ingredient. Plain saline spray may not work.
Ingredients
- Prepared glue stick base from 2 glue sticks
- 1/8 to 1/4 teaspoon baking soda
- 1 to 2 teaspoons contact lens solution, added slowly
- Food coloring or glitter, optional
Steps
- Make the glue stick base until it is smooth and warm, not hot.
- Stir in food coloring or glitter if you want colorful slime.
- Add 1/8 teaspoon baking soda and mix well. If the base is very loose, use up to 1/4 teaspoon.
- Add 1/2 teaspoon contact lens solution and stir quickly.
- Continue adding contact solution a few drops at a time until the slime pulls away from the bowl.
- Pick it up and knead for 2 to 3 minutes.
- If it sticks badly to your fingers, add one or two more drops of contact solution and knead again.
Texture Tips
This method usually creates a small, soft, stretchy slime. It may feel sticky at first, but kneading matters. Do not panic-add half the bottle of contact solution. That is the fast lane to stiff slime. Add activator slowly, like you are seasoning soup, not putting out a fire.
If your slime is too sticky, knead longer before adding more activator. If it becomes too stiff, try working in a few drops of warm water or a tiny bit of lotion. If it tears instead of stretching, it may be overactivated. Let it rest in a sealed container for 10 minutes, then knead again.
Way 2: Make Glue Stick Slime With All-in-One Slime Activator
All-in-one slime activator is the easiest method for beginners because it is designed specifically for slime. It often replaces the need for separate baking soda and contact solution. This makes the process less fussy, especially for parents, teachers, and anyone who does not want to turn the kitchen counter into a chemistry-themed escape room.
Ingredients
- Prepared glue stick base from 2 glue sticks
- 1 to 3 teaspoons all-in-one slime activator
- Food coloring, glitter, or confetti, optional
Steps
- Prepare the glue stick base with warm water until smooth.
- Let it cool slightly if you used the microwave.
- Add color or glitter and stir until evenly mixed.
- Add 1 teaspoon slime activator and stir for 30 seconds.
- Add more activator 1/2 teaspoon at a time until the mixture thickens.
- When the slime clumps together and pulls from the bowl, knead it by hand.
- Stop adding activator once the slime is stretchy but no longer coats your fingers.
Why This Method Is Great for Beginners
The all-in-one activator method is forgiving. You do not have to balance baking soda with contact solution, and the slime usually comes together smoothly. It is also a good choice when making glue stick slime with kids because there are fewer ingredients to measure. Fewer ingredients means fewer chances for someone to ask, “Was that one teaspoon or one tablespoon?” while holding a suspiciously full spoon.
The downside is that glue stick slime made this way may still be smaller and slightly denser than slime made with bottled school glue. Glue sticks are simply not as fluid. But for a quick DIY slime recipe using school supplies, this method is reliable, low-mess, and fun.
Way 3: Make Glue Stick Slime With Liquid Starch
Liquid starch can also activate glue slime. This method often creates a softer, slightly jiggly texture. It is a good option if you want slime that stretches slowly and feels more like classic putty. However, liquid starch should be added carefully because too much can make slime stringy or wet.
Ingredients
- Prepared glue stick base from 2 glue sticks
- 1 to 3 teaspoons liquid starch
- 1 teaspoon warm water, only if the glue base is too thick
- Color, glitter, or small foam beads, optional
Steps
- Make your glue stick base and stir until smooth.
- Add color or mix-ins before activating.
- Pour in 1 teaspoon liquid starch and stir well.
- Wait 20 to 30 seconds. The mixture may thicken slowly.
- Add another 1/2 teaspoon liquid starch if the slime is still very sticky.
- Knead on a clean surface for several minutes.
- Let the slime rest in a sealed container for 5 to 10 minutes if it feels too wet.
Best Use for This Method
Liquid starch glue stick slime is best when you want a soft sensory slime rather than a bouncy slime. It can be a little looser than the contact solution version, especially if you added too much water while melting the glue sticks. Start with less starch than you think you need. You can always add more, but you cannot easily take it back unless you own a tiny slime time machine.
Common Glue Stick Slime Problems and Fixes
My Glue Stick Slime Is Too Sticky
Knead it for a full 2 to 3 minutes before adding more activator. Warm glue stick slime often feels sticky at first and firms as it cools. If it still sticks everywhere, add activator one drop or 1/4 teaspoon at a time.
My Slime Is Rubbery
You probably added too much activator. Try kneading in a few drops of warm water or lotion. Let the slime rest in an airtight container for 10 to 15 minutes. Sometimes it relaxes and becomes stretchier.
My Glue Stick Base Has Lumps
The glue was not dissolved enough before activation. Warm it gently and stir longer next time. For the current batch, try pressing lumps against the side of the bowl with a spoon. Large lumps may not fully disappear once activator is added.
My Slime Did Not Form
Check your activator. Contact solution must contain borate ingredients to work. Liquid starch formulas vary, and some products may not activate slime well. Also, too much water can dilute the glue base, making slime weak and soupy.
Creative Add-Ins for Glue Stick Slime
Once you understand the basic recipe, glue stick slime becomes a tiny laboratory of texture. Add glitter for sparkle, foam beads for crunch, or a drop of food coloring for a bright finish. You can also fold in instant snow for a cloud-like feel or a tiny bit of lotion for softness. Keep add-ins modest. Glue stick slime batches are small, so a mountain of glitter can overwhelm the slime and turn your craft table into a disco floor.
For a classroom activity, try making three mini batches using the three activator methods above. Label each container and compare stretch, bounce, stickiness, and softness. This turns a simple slime recipe into an easy STEM experiment about polymers, measurement, and cause-and-effect. It also gives kids a reason to use words like “viscosity,” which sounds impressive even when everyone is covered in sparkles.
How to Store Glue Stick Slime
Store finished slime in an airtight container or zip-top bag. Keep it away from carpet, hair, fabric furniture, pets, and younger siblings who believe every object deserves a taste test. Most homemade slime lasts a few days to a week, depending on ingredients and cleanliness. If the slime becomes dry, dirty, watery, or smelly, throw it away and make a fresh batch.
Hands-On Experience: What Making Glue Stick Slime Is Really Like
The first thing you notice when making glue stick slime is that it is not as effortless as pouring liquid glue from a bottle. A glue stick has opinions. It clumps, resists, softens slowly, and generally behaves like it has somewhere else to be. The best experience comes when you treat the first step like preparation, not a race. Cutting the glue into small pieces makes a huge difference. One big chunk takes forever to smooth out, while small pieces melt into the water much more evenly.
In a real kitchen or classroom setup, the contact solution and baking soda method feels the most “classic.” The slime thickens quickly, and kids can see the change almost immediately. It starts as a sticky paste, then suddenly pulls away from the bowl. That moment is the slime equivalent of a magic trick. The key lesson from experience is restraint. Beginners often add too much contact solution because the slime sticks to their fingers during the first minute. But stickiness is not always failure. Sometimes it is just unfinished kneading.
The all-in-one activator method feels the cleanest. It is the method I would choose for a quick craft table, a rainy-day activity, or a parent who does not want to read every contact solution label in the store aisle. It gives you fewer variables to manage. The texture tends to be smooth and compact, especially when the glue stick base is thick. It may not stretch across the room like internet slime videos, but it makes a satisfying palm-sized slime that squishes, folds, and pokes nicely.
The liquid starch version is the most relaxed but also the easiest to overdo. It can create a softer slime, but if you pour too much starch at once, the batch may feel slippery before it comes together. The best approach is to add a little, stir, wait, and knead. Waiting matters. Glue stick slime sometimes needs a minute to decide what kind of slime it wants to become. Apparently, even slime needs personal growth time.
One practical experience tip: do not add glitter until the glue stick base is fully smooth. Glitter hides lumps. It looks festive, but it also makes it harder to see whether the glue has dissolved. Another tip is to use a silicone spatula if you have one. It scrapes the bowl better than a plastic spoon and saves you from losing half the batch to the sides of the container.
The biggest takeaway is that glue stick slime is a clever “use what you have” craft, not a perfect replacement for bottled glue slime. It is smaller, thicker, and a little more experimental. That is also what makes it fun. When it works, it feels like you have rescued a forgotten school supply and given it a weird, stretchy new career.
Conclusion
Learning how to make glue stick slime is a fun way to turn everyday school supplies into a hands-on science craft. The contact solution method is great for classic stretchy slime, the all-in-one activator method is the easiest for beginners, and the liquid starch method gives a softer sensory texture. For the best results, start with washable, nontoxic glue sticks, dissolve them into a smooth base, and add activator slowly. Slime rewards patience. It punishes panic-pouring.
Whether you are making a quick after-school craft, planning a classroom STEM activity, or rescuing a dried-out craft drawer from boredom, these three glue stick slime recipes give you simple options with plenty of room for creativity. Just remember: slime belongs in hands, containers, and science conversationsnot mouths, carpets, or the dog’s eyebrows.


