Table of Contents >> Show >> Hide
- Before You Start: The “Don’t Make It Dry” Rules
- Quick Doneness & Timing Cheat Sheet
- Way #1: High-Heat Sheet Pan Chicken (Fast, Browned, Weeknight-Friendly)
- Way #2: Covered Bake (Steam-Assist) for Extra-Juicy Chicken (Saucy, Forgiving, Perfect for Thick Pieces)
- Way #3: Crispy “Oven-Fried” Chicken Cutlets (Crunchy, Kid-Approved, Still Baked)
- Common Mistakes (and How to Avoid Them)
- FAQ: Real Questions People Ask While Staring Into Their Oven
- Conclusion: Pick Your Chicken Personality
- Kitchen Stories: of Real-Life Chicken Experience
Boneless, skinless chicken is the weekday superhero of American kitchens. It’s lean, it’s affordable-ish (depending on what mood your grocery store is in),
and it can taste like anythingfrom “Sunday comfort” to “I meal-prepped like an adult.” The only catch? Chicken can go from juicy to “why is this
chewing gum?” in about 90 seconds.
This guide gives you three reliable ways to bake boneless skinless chickeneach with clear steps, temperature targets, and flavor ideas.
You’ll also get a quick doneness cheat sheet, common mistakes to avoid, and real-kitchen notes so you can bake chicken confidently (even when your oven runs
hot and your family runs impatient).
Before You Start: The “Don’t Make It Dry” Rules
1) Use a thermometer (your future self will thank you)
Chicken is done when the thickest part hits 165°F. Not “looks white,” not “juices run clear,” not “my aunt’s vibes say it’s fine.”
A basic instant-read thermometer turns chicken from a gamble into a guarantee.
2) Even thickness = even cooking
If one end is twice as thick, the thin end will overcook while the thick end is still warming up. Two easy fixes:
pound the chicken to an even thickness, or slice a thick breast horizontally into two thinner cutlets.
3) Salt early when you can
Salting chicken ahead of time (even 30–60 minutes) seasons deeper and helps it stay juicy. If you have longerlike a few hours or overnightgo for it.
This is the quiet superpower behind “restaurant-style” chicken.
4) Rest is not optional
Let baked chicken rest 5–10 minutes before slicing. This keeps juices in the meat instead of on your cutting board like a sad puddle of regret.
Quick Doneness & Timing Cheat Sheet
Exact time depends on thickness, your pan, and whether your oven is honest. Use this as a starting point, then trust the thermometer.
- Thin cutlets (about 1/2 inch): 10–15 minutes at 425–450°F
- Average breasts (about 3/4 inch): 18–22 minutes at 425°F
- Thicker pieces (1 inch+): 22–30 minutes at 400–425°F (or use the covered method below)
Safe internal temp: 165°F in the thickest part. If you’re pulling it slightly earlier (like 160°F) to account for carryover cooking,
make sure it reaches 165°F during rest.
Way #1: High-Heat Sheet Pan Chicken (Fast, Browned, Weeknight-Friendly)
This is the “I want dinner now” method: high heat, short bake time, and a nice little golden exterior. It’s especially great for
boneless skinless chicken breasts and tenderloins.
Why it works
- High heat cooks quickly so the chicken spends less time drying out.
- A thin coat of oil helps browning and keeps seasonings stuck on (instead of decorating your pan).
- Cutlets or evenly pounded pieces cook predictablyno mystery math.
Step-by-step
- Preheat oven to 425°F. (If your oven is gentle, you can go up to 450°F.)
- Prep chicken: If breasts are thick, slice horizontally into cutlets or pound to an even thickness (about 3/4 inch is a sweet spot).
- Season: Sprinkle both sides with salt and pepper. Add 1–2 teaspoons of your seasoning blend (ideas below). Drizzle with a little oil and rub it in.
- Arrange on a sheet pan: Leave space between pieces so they roast instead of steam. Line the pan with foil or parchment for easy cleanup.
- Bake 18–22 minutes for average thickness, flipping once if you want more even color. Start checking at 15 minutes for thinner cutlets.
- Check temperature: Pull when the thickest part reads 165°F.
- Rest 5–10 minutes, then slice against the grain.
Seasoning ideas (pick one)
- Garlic-Paprika Classic: garlic powder, paprika, onion powder, black pepper
- Italian-ish: Italian seasoning, garlic, lemon zest
- Southwest: chili powder, cumin, smoked paprika, pinch of brown sugar
- Simple Lemon Pepper: lemon pepper + a squeeze of lemon after baking
Specific example: “Meal Prep Chicken” that stays juicy
Bake at 425°F with salt, pepper, garlic powder, and olive oil. After resting, slice and store in containers with a spoonful of sauce
(pesto, salsa, or a yogurt-lemon dressing). Saucing after cooking is a sneaky trick that makes day-3 chicken still feel alive.
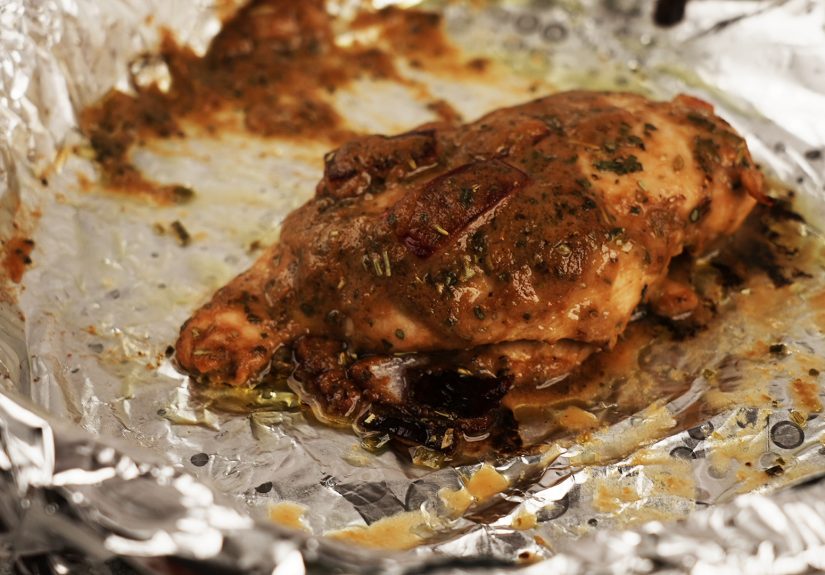
Way #2: Covered Bake (Steam-Assist) for Extra-Juicy Chicken (Saucy, Forgiving, Perfect for Thick Pieces)
If you’ve ever baked chicken in a dish with a sauce and wondered why it came out more tender, here’s the secret: the cover traps moisture and heat,
gently cooking the chicken so it stays juicy. Then you uncover at the end to concentrate flavor and lightly brown.
Why it works
- Moist heat is more forgivinggreat for thicker breasts and boneless thighs.
- Chicken cooks in a flavorful environment (sauce, broth, aromatics), not a dry blast furnace.
- It’s basically “set it, forget it, become a legend.”
Step-by-step
- Preheat oven to 400°F.
- Season chicken with salt and pepper. (You can add garlic powder, oregano, paprikawhatever fits your sauce.)
-
Build a quick “moisture bed” in a baking dish:
add 1/3 to 1/2 cup broth, or a sauce like salsa, marinara, or a mustard-herb mix. - Arrange chicken in the dish, spooning some sauce over the top.
- Cover tightly with foil.
- Bake covered 10–15 minutes.
- Uncover and bake another 10–20 minutes, until the thickest part hits 165°F.
- Rest 5–10 minutes in the dish (loosely tented) so juices settle.
3 sauce combos that never get old
-
Salsa Verde Bake: salsa verde + a little cumin + sliced onions.
Serve with rice and black beans. -
Creamy Marinara-ish: marinara + Italian herbs + a dollop of cream cheese (optional).
Serve over pasta. -
Mustard-Herb Roast Vibes: yellow mustard + olive oil + garlic + dried thyme/rosemary.
Serve with roasted potatoes.
Pro tip: Don’t drown it
A moderate amount of liquid is ideal. Too much turns your bake into “chicken soup, but confused.”
You want enough moisture for tenderness, not so much that the chicken boils.
Way #3: Crispy “Oven-Fried” Chicken Cutlets (Crunchy, Kid-Approved, Still Baked)
Sometimes you don’t want “healthy chicken.” Sometimes you want crunch.
This method uses thin cutlets, a breadcrumb coating, and high heat to get a crispy exteriorwithout deep frying and without turning your kitchen into a grease-scented candle.
Why it works
- Thin cutlets cook fast and stay tender.
- A rack (or preheated sheet pan) helps air circulate for crispiness.
- A light mist of oil helps the coating brown instead of staying pale and judgmental.
Step-by-step
- Preheat oven to 425°F.
-
Prep chicken: Slice breasts into cutlets or pound to about 1/2 inch.
Season with salt and pepper. -
Set up a quick breading line:
- Bowl 1: flour (optional, but helps coating stick)
- Bowl 2: beaten egg (or mayo thinned with a splash of water)
- Bowl 3: panko + grated Parmesan + garlic powder + paprika
- Coat: Flour (optional) → egg → panko mixture. Press crumbs on like you mean it.
- Bake on a rack set over a sheet pan (or on parchment). Lightly spray the tops with oil.
- Bake 12–18 minutes depending on thickness, flipping once if you want max crunch.
- Temp check: Pull at 165°F, rest 5 minutes, then serve.
Serving ideas
- Chicken Parm shortcut: top with marinara + mozzarella for the last 3–5 minutes
- Crunchy salad topper: slice and throw over Caesar or a simple arugula salad
- Sandwich mode: toasted bun, pickles, mayo, hot saucedone
Common Mistakes (and How to Avoid Them)
Mistake: Baking by time only
Ovens vary, chicken sizes vary, and life is chaos. Time is a guideline; temperature is the truth.
Mistake: Overcooking “just to be safe”
Safety matters, but overshooting 165°F by a lot is where chicken gets dry and tough. Use a thermometer and pull as soon as it hits the target.
Mistake: Slicing immediately
If you slice right away, juices spill out and your chicken dries faster than a meme trend.
Rest it, then slice.
FAQ: Real Questions People Ask While Staring Into Their Oven
Can I bake chicken from frozen?
It’s better (and more even) to thaw first, but you can bake from frozen in a pinch. Expect it to take significantly longer, and seasonings won’t stick as well.
For best results, use the covered bake method and check with a thermometer until it reaches 165°F.
Should I use convection?
If you use convection, chicken may cook faster and brown more. A common approach is to lower the oven temperature slightly or start checking earlier.
Either way: thermometer wins.
Breasts vs thighs: do they bake the same?
Boneless skinless thighs are more forgiving because they have a bit more fat. They can handle longer cooking without drying out, which makes them great for the covered method.
Breasts benefit the most from even thickness and careful temperature monitoring.
Conclusion: Pick Your Chicken Personality
If you want speed and browning, go High-Heat Sheet Pan. If you want tender, saucy, “I can’t mess this up” energy, go Covered Bake.
If you want crunch without frying, go Oven-Fried Cutlets. Same ingredient, three different vibesbecause chicken deserves options too.
Kitchen Stories: of Real-Life Chicken Experience
The first time I tried to “just bake chicken breasts” I treated it like a personality test: I guessed the time, poked the chicken with a fork like it owed me money,
and declared it done when it stopped looking suspicious. The result was… edible, technically. But it had the texture of a gym towel and the charisma of a beige wall.
That’s when I learned the hard truth: chicken doesn’t care about your confidence. Chicken respects thermometers.
Once I started using a thermometer, everything changed. I remember pulling a batch of high-heat sheet pan chicken at exactly 165°F, letting it rest,
and slicing it to find actual juicelike, real moisture that didn’t instantly evaporate into disappointment. It was such a small win, but it felt huge,
because suddenly chicken wasn’t a gamble. It became a reliable building block: tacos one night, salads the next, and a “why did I ever buy deli meat?”
sandwich on day three.
My favorite “save a busy week” trick is slicing thick breasts into cutlets. It sounds basic, but it solves two problems at once: it cuts cook time,
and it prevents the dreaded thin-end-overcooked / thick-end-undercooked situation. I used to fight with giant chicken breasts like they were a boss battle.
Now I just split them, season them, and they bake evenly like they want to be part of a functional household.
The covered bake method is what I use when I’m tired or feeding people who interpret “seasoning” as a personal attack. You can’t argue with chicken that
bakes in salsa or marinara under foil. It comes out tender, it smells like dinner, and it basically makes its own sauce. I’ve made versions with mustard and herbs,
with marinara and spinach, with broth and lemonevery time it tastes like I planned it, even when I absolutely did not.
And then there are oven-fried cutlets, the method that turns chicken into an event. The first time I did panko + Parmesan and baked it on a rack,
I kept opening the oven like an excited golden retriever. When that coating finally browned and crisped, I felt like I’d hacked the system.
It’s not deep-fried crunchy, but it’s the kind of crisp that makes people stop scrolling and look up from their phones. Serve it with a lemon wedge or a quick sauce,
and suddenly baked chicken is not “healthy food”it’s “can we have this again?”
If there’s one lesson I’ve learned, it’s this: baked chicken isn’t about finding one perfect recipe. It’s about having a few dependable methods
you can rotate based on your mood, your time, and how chaotic the day has been. Pick a method, use a thermometer, let it rest, and you’ll end up with chicken
that’s actually worth eatingno chewing required.


